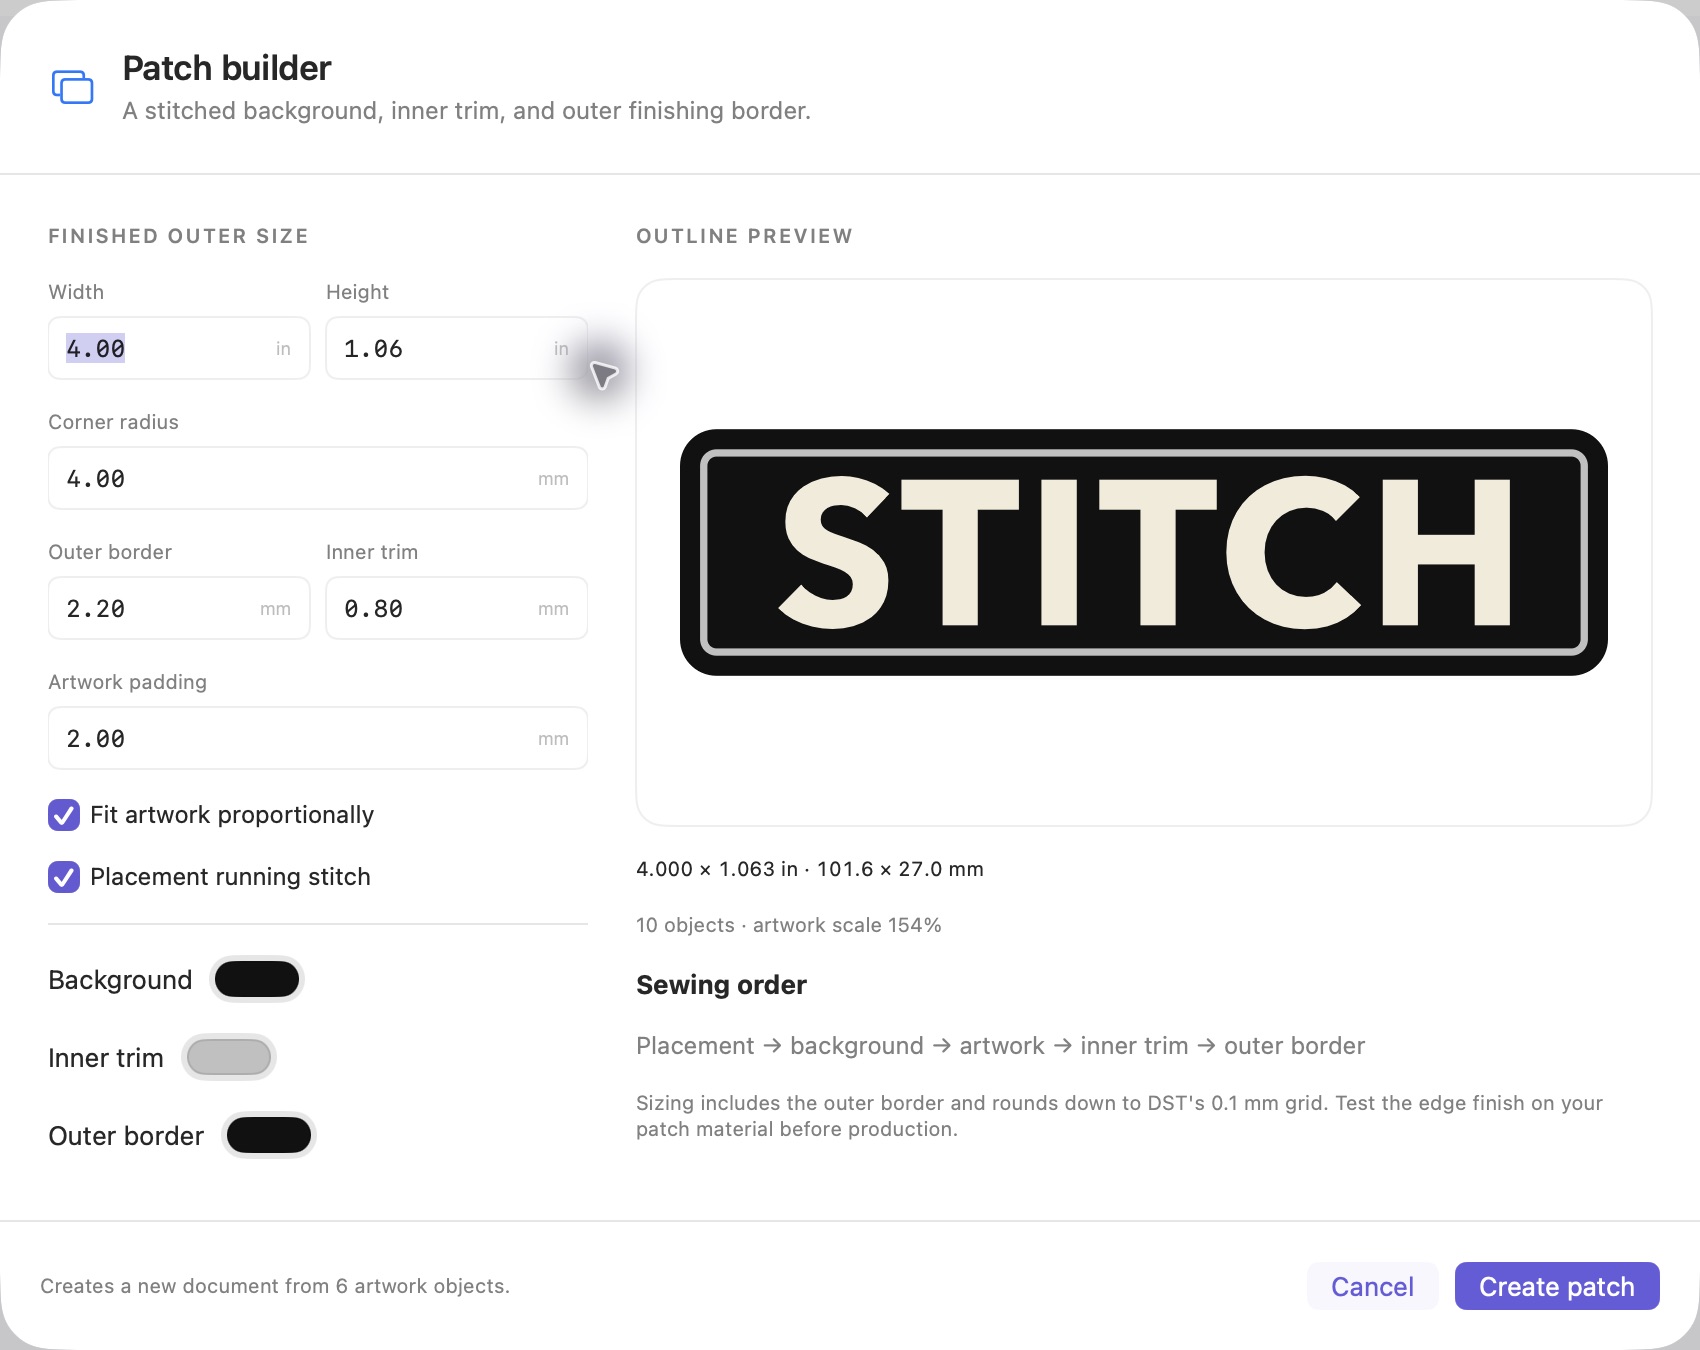
Define what the finished width includes
If the patch must be four inches wide, treat that as the complete finished design, including the outside border. Setting the artwork alone to four inches and adding a border afterward can produce an oversized patch.
Choose the shape and target dimensions before arranging the lettering. Keep clearance between the artwork and inner trim, and reserve space for the outer edge. Studio’s export review reports dimensions from the encoded DST, which is the final check on the file rather than just the drawn shapes.
Choose fabric or a fully stitched background
A black center can come from black patch fabric showing through, or from a layer of black fill stitches. These are different constructions. A fully stitched background adds coverage and sewing time, and its interaction with the fabric needs a sample.
For a fully embroidered design, enable and plan the stitched background. Review its fill direction, spacing, underlay, and compensation. Then place the logo or lettering as separate objects above it. Keep the background editable so you can change the construction without retracing the artwork.
Separate the inner trim from the outer border
For a black patch with a silver line, the silver line is the inner trim; the outer finishing border can still be black. Represent them as separate layers with deliberate thread assignments. That avoids accidentally making the decorative silver trim the entire outside edge.
Studio’s patch builder provides placement, stitched background, inner trim, and outer finishing border components. Review their geometry together at the intended size. An embroidered finishing border is not a claim that the file creates a separate mechanically merrowed edge; the final edge treatment depends on your production process.
Plan sewing order around the construction
- Placement: establish where the patch belongs in the hoop and how it aligns with the material.
- Background: sew the planned fill when the patch uses a fully stitched base.
- Artwork: position the logo and lettering in the intended sequence, checking overlaps and travel.
- Trim and finish: inspect how the inner trim and outer border cover or meet the earlier layers.
This is a planning sequence, not a universal manufacturing prescription. Review the order for your material, cutting method, and machine setup. Step through the simulation to confirm the actual stitch plan follows the construction you intend.
Keep small lettering and thread choices readable
At patch size, a narrow opening or small gap can disappear even if it is visible in the source image. Review the lettering at final size and keep its spacing consistent. Use satin sections where appropriate and inspect branched strokes such as K and open letters such as G.
See the lettering guide for shape and spacing checks. Keep a thread list with the export: a DST sequence alone does not reliably communicate your intended silver shade or black thread brand to the operator.
Export a package, then test the patch
Check total width and height, hoop margins, long movements, and untrimmed jumps in the export review. Save the DST with the editable project, thread plan, and production notes. Reopen the DST in the needle command editor to inspect the file you will transfer.
Sew a sample on the intended material and evaluate edge coverage, registration, stiffness, letter clarity, and finished dimensions. Record changes against the same project revision. If you are starting from a logo image, follow the image-to-DST workflow before building the patch around it.
MAKE YOUR NEXT DESIGN
Bring the details into Studio.
Explore the actual Mac workspace, see the workflow, and choose the plan that fits your work.
Compare plans ↗