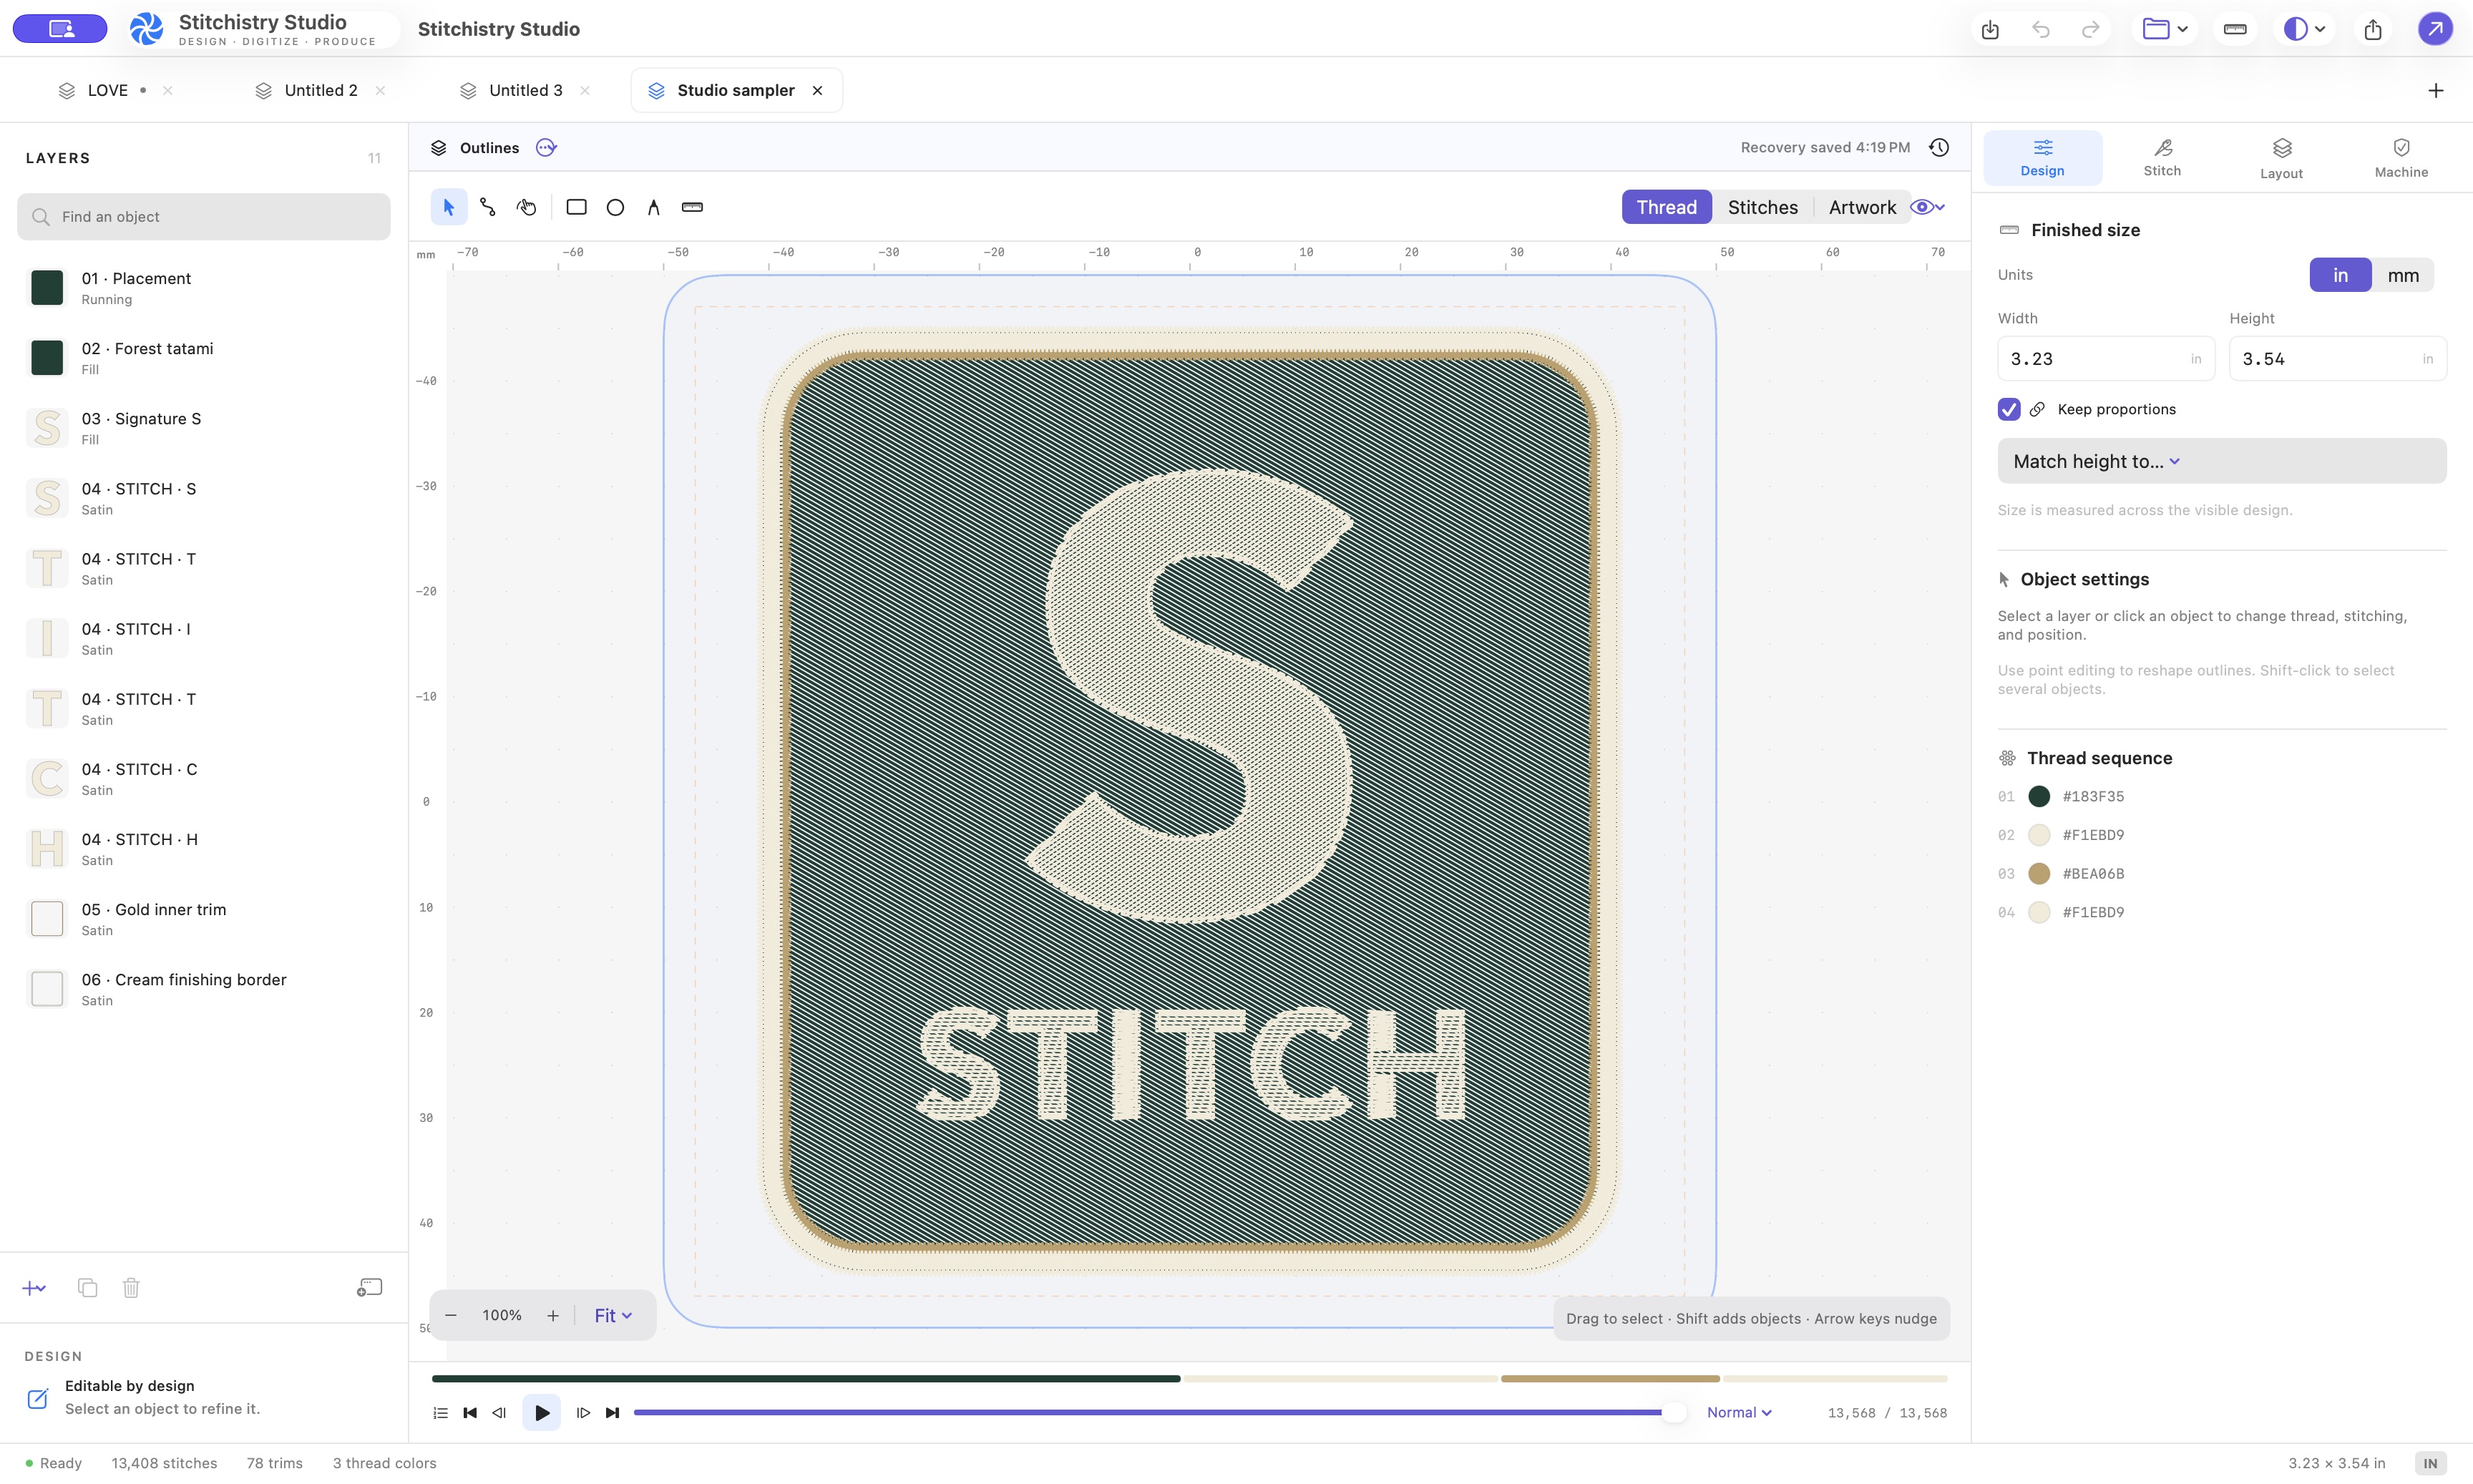
What image-to-DST conversion actually does
A PNG or JPG describes pixels. A DST file describes embroidery machine movements. Changing the filename extension cannot turn one into the other. Digitizing adds decisions the picture does not contain: stitch type, sewing direction, density, underlay, travel between objects, and finished dimensions.
Studio traces the artwork into editable outlines, then creates a stitch plan. That gives you a chance to correct a letter, remove an unwanted island, or change a fill before exporting. Simple logos and clear lettering give you a more manageable starting point than photographs, gradients, or textured artwork.
A practical PNG or JPG to DST workflow
- Import your artwork. Start with the clearest original you have. Studio accepts PNG, JPEG, HEIC, TIFF, and BMP. Adjust color reduction and background removal so the trace contains the shapes you intend to sew.
- Set the finished size. Work in physical dimensions, not image pixels. Preserve proportions when resizing, and check the smallest details at the intended size.
- Refine the outlines. Compare the trace with the source image. Use Bézier anchors and handles to smooth curves without changing the character of the original lettering.
- Choose the stitches. Set fill, satin, or running stitches as appropriate. Adjust spacing, direction, underlay, and compensation for the design and fabric.
- Simulate and inspect. Follow the sewing sequence, looking at jumps, gaps, small details, and the order of overlapping objects.
- Review and export. Check the dimensions measured from the encoded DST and the machine warnings. Save the editable project with the machine file, then sew a sample before production.
Prepare the artwork before you trace
Use solid, clearly separated shapes where possible. Remove compression noise and decorative shadows that should not become stitching. A metallic logo can be interpreted in a single silver or gray thread; its photographic highlights do not have to become dozens of tiny stitch objects.
Background removal is a design choice. A black rectangle might be unwanted background behind lettering, or it might be the intended stitched base of a patch. Decide which it is before tracing. For a badge, the patch construction workflow lets you plan the background and borders separately.
Keep the font and spacing recognizable
Watch the interior openings of letters and the joins where strokes branch. A K needs its diagonal arms to remain distinct, a G needs a readable opening and crossbar, and a V should retain the tip or flat foot drawn in the original. Increasing smoothing until every edge looks rounded can erase those differences.
For several words that should share a height, use a common height and a maximum width. Forcing each word to the same width changes its proportions or apparent scale. Read our lettering guide for a closer look at satin sections and sizing.
What you need to use Studio
Stitchistry Studio runs on Apple Silicon Macs with macOS 14 or later. It is a desktop application; conversion and editing happen on your Mac. Sign in with an emailed code and choose the $10 USD monthly plan or a perpetual license. Downloading the installer does not start a purchase, and there is no free trial.
Export is Tajima DST. Check that your embroidery machine supports DST and that the design fits its usable sewing area. If it requires another format, Studio’s DST export alone will not meet that requirement.
See the full conversion
The 83-second Studio demo shows a PNG monogram being traced, resized, edited, simulated, exported, and reopened as a DST. It is an actual app recording edited for pace. The written walkthrough is available beside the video.
Already have a DST? See what you can change in the DST file editor, and why retaining the original project matters.
MAKE YOUR NEXT DESIGN
Bring the details into Studio.
Explore the actual Mac workspace, see the workflow, and choose the plan that fits your work.
Compare plans ↗